
Growing up, the only option for photography was using film. With the digital photography entering the market, film was quickly replaced with better quality photos and not having to wait for the film to be developed. However, film has a vibe that can not be truly replicated by digital technology. As with my analog glitch art, digital technology now provides us with new ways to manipulate the medium.
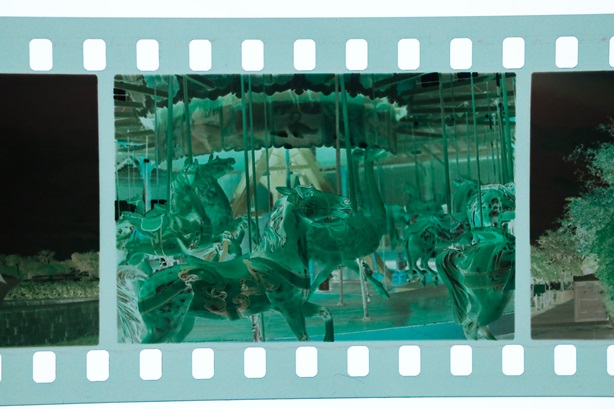
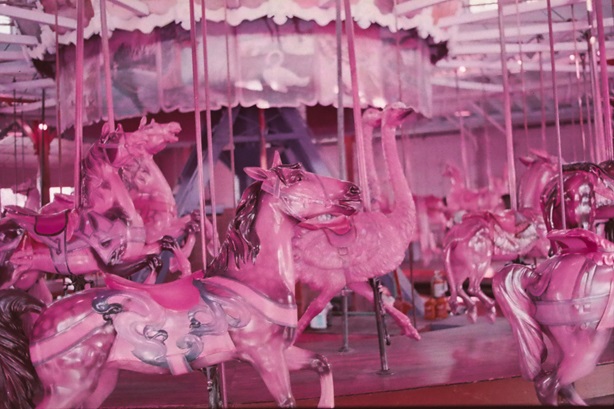
My dad gave me his old Canon EOS 10S that he used while I was growing up. I’m always looking for new ways to express myself and discovered from unique filmstocks available. The ones that caught my eye the most were Lomography‘s Purple and Turquoise along with the various batches of Psychedelic Blues.
With the decline of film, options for getting it developed are limited. Fortunately there is one store left in my city that will develop film and return the negatives. I opted to explore scanning the negatives myself. The scanning part is straight forward with the right equipment. I’m using my Canon EOS R and the RF 100mm 2.8 macro lens. For my quick and dirty scanning rig, I’m using Duplos to space the film above my cell phone that is providing the backlight for the scan.
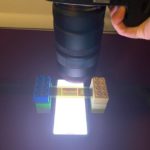
It is important to note that when scanning the film from a camera, use a custom white balance setting at the wamest temperature your camera can do. On the EOS R, I have it set to 2700k. The spacing of the film my cell phone is also important because the macro lens can pick up the individual LEDs of my phone screen.
The images are then processed in Lightroom by inverting the light curve and making slight adjustments to the color. If you have your ISO set to auto when taking the film scans, you’ll need to adjust the exposure in Lightroom as it may be too bright.
I’m going to continue to use film as an outlet for my creativity. Be sure to follow along!